Buying jewelry online has always had one major drawback: you can’t try it on. If you’re selling this way, it helps to visually communicate how your jewelry will look on the body. Good product photography is important, but sometimes it’s too abstract.
You can do model shots surprisingly well without spending a dime. But since one of this blog’s most visited posts is how to photograph jewelry: tips from the pros, I’ll start with a pro.
Eydís Einarsdóttir specializes in jewelry and high-end model shots for magazines and has won many prestigious awards for her photography. She has generously shared her secrets about product photography with me in the past. This time I asked her about shooting jewelry on models.
You don’t have to hire a model to photograph your jewelry on one – but if the jewelry sells for tens of thousands, you probably should now and then. This is the kind of jewelry Eydis photographs in her Vancouver studio.

Professional photographers like Eydis work with stylists and makeup artists, spend hours staging the jewelry, “bracketing” shots – taking several images of each angle at different exposures, yet more hours tweaking them in Photoshop. Shooting rings for Instagram or Etsy is a far cry from producing a full-page ad in a glossy magazine. But there are a few things you can learn from the pros.
Keep the focus on the jewelry.
With commercial jewelry, the model is essentially a prop. “Shooting jewelry on models is a tricky situation, because you are selling the jewelry, not the model,” Eydis says. “I always try to make sure the jewelry is what your eye is drawn to. But I have to incorporate the model into it so she communicates the emotion behind it, or the grandeur, depending on what kind of jewelry it is.”
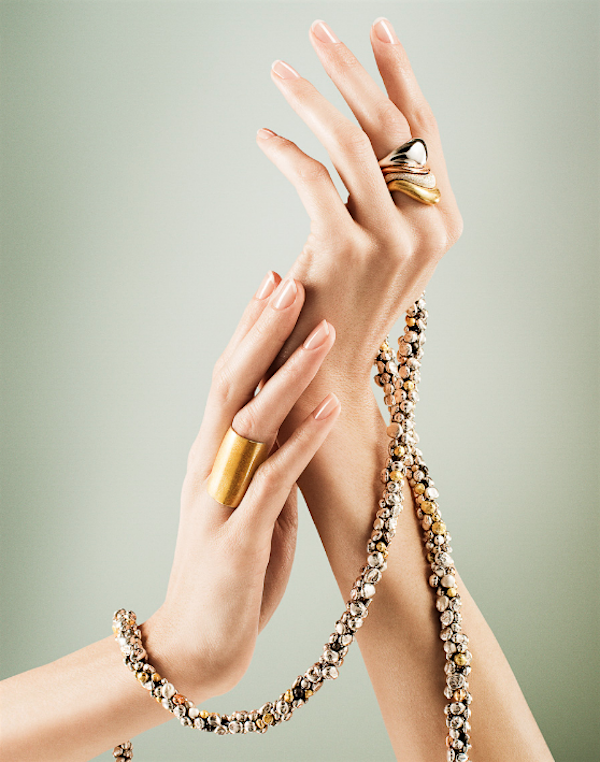
For this hand shot, she scouted 25 models before finding one with “absolutely gorgeous hands.” The model had a manicure first – always a good idea when you’re photographing jewelry on hands, yours or someone else’s.
“I was not able to put her in a tent obviously, but I set up a mount so the reflection in that big ring didn’t show the studio and me,” Eydis says. “Then I put up a sheet and shot through it, used it as a scrim.”
For even lighting in studio model shoots, create a giant light box.
Unlike with product photography, you can’t just stick the jewelry – with the model wearing it – into a light box to produce even reflection. Some studio photographers set up a labyrinth of reflectors and white umbrellas around the subject. Eydis uses a sheet or sheer curtain for the same purpose, essentially creating a large soft-box.
“For me, jewelry is the hardest thing to photograph, whether it is on a model or a tabletop,” she says. “You have to light diamonds and gemstones so they pop. You’re also dealing with a lot of reflective area with the metals.”
Plus, the model is moving and flesh requires different lighting than metal or stones. “Trying to light both model and jewelry beautifully is not easy,” she says. “It also changes with each pose.”
Give the model some direction.
Barking orders like “Big smile!” can get you a strained, phony expression. Instead, give the model some direction before you begin and then engage with them as you shoot. Put the model at ease.
Ultimately, her facial expressions will influence our reaction to the jewelry she’s wearing. Shooting models turns Eydis into something of a movie director. “I tell the models what I want them to project, but some are better at emoting than others.”
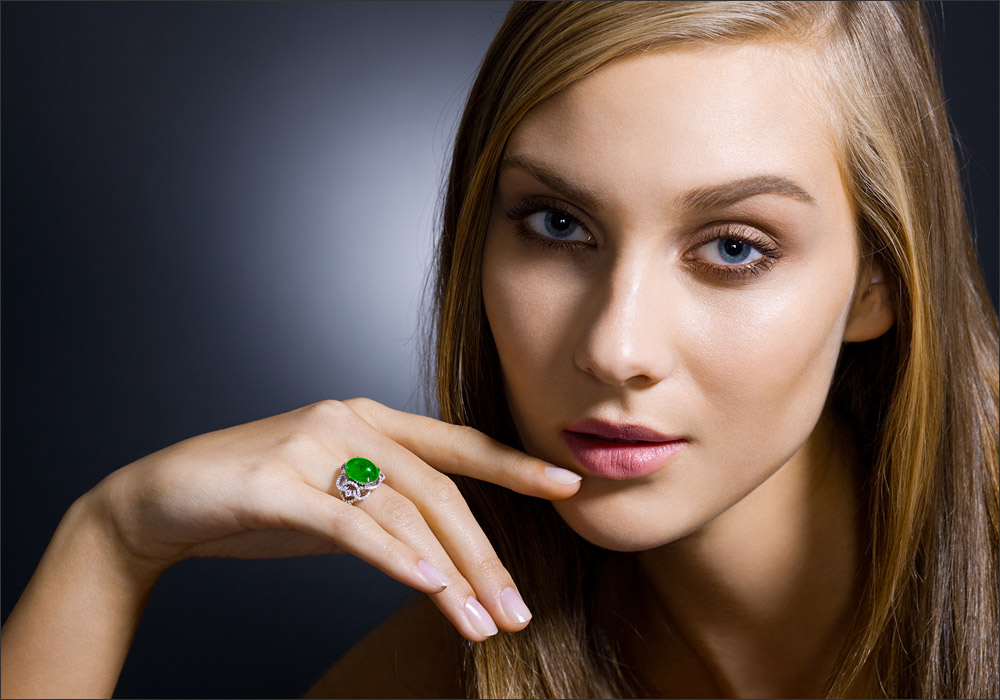
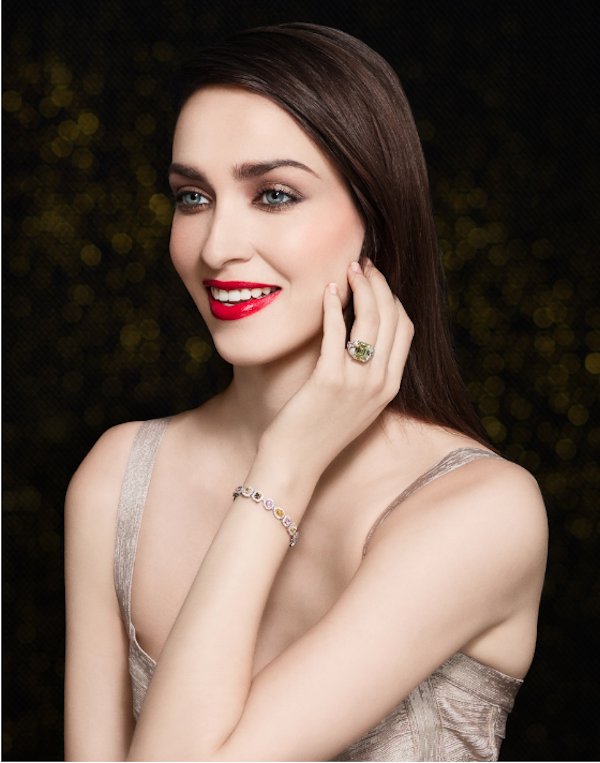
For the image above, Eydis gave the model “just a bit of theory: she’s looking at her husband or boyfriend across the table and kind of mesmerized.” The model’s job was to think about her boyfriend while Eydis’s assistant was moving around her shining a spotlight on that ring. You can see the light is coming from the right, lighting up her hand and one side of her face, casting shadow on the rest.
Create a mood that suits the jewelry.
Without props or visible clothing, Eydis managed to create a mood with this shot, a suggestion of evening and romance. It’s sort of Rembrandt-like, this lighting. Rembrandt was working by candlelight so the lighting was always coming from one side of his subjects and throwing the other into deep shadow. Sometimes people obsess over lighting everything evenly when they’re shooting on a model. Don’t be afraid to cast some shadow, especially if you’re shooting jewelry that’s elegant and dressy. All you really need to light perfectly is the jewelry.
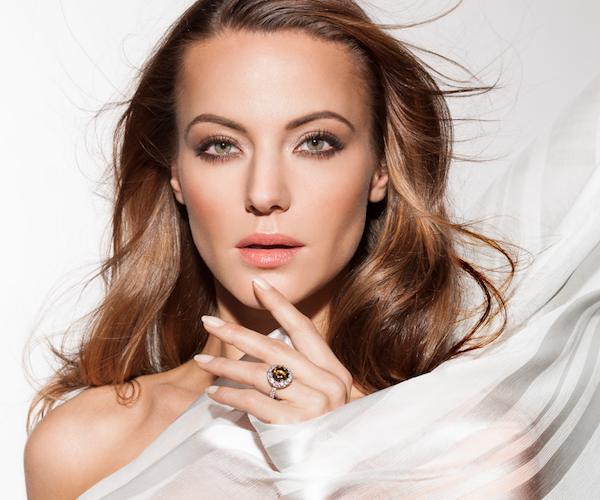
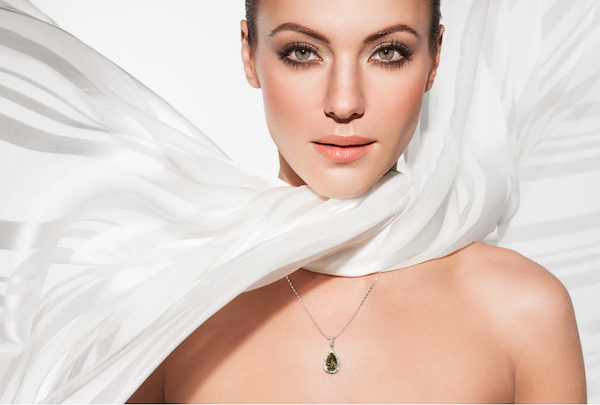
Eydis told me she tries to keep clothing from drawing attention from the jewelry. In several shots on her website, the model wears nothing but this white, semi-transparent silk scarf Eydis bought for the shoot. To achieve the look of wind-blown hair and scarf, she had her assistant fan her with a piece of Foamcore. “An electric fan is too powerful and dries out the model’s eyes,” she says.
Retouch judiciously.
One thing you’re probably never going to replicate in the spreads you see in fashion magazines: the retouching. Making images look like these requires hours of messing with images at the computer – especially when you work with a model. Photoshopping a model wearing jewelry can require 16 layers. “It’s easier to combine still images, because the model is constantly moving. So getting a proper registration on her and on the jewelry simultaneously would be extremely difficult.”
“With a model, I even out skin tones using old-style retouching techniques,” she says. “I don’t use the blurring or airbrushing that’s become so popular. I try to make sure you can see the texture of the skin.”
I personally hate when people blur the flesh of the model with filters to the point where the woman herself looks like she’s being erased. I see this a lot on Instagram. I tend to err on the side of reality, but a little retouching can keep the focus on the jewel. Just don’t go too crazy.
Even if you can’t afford a stylist, take some time with hair and makeup and get a good manicure before you aim the camera. The kind of studio lighting Eydis uses requires a different approach to makeup than natural lighting. The models in these shots are wearing a lot of professionally applied makeup. Experiment to see what works best, and then be consistent.
Eydis’s equipment: Canon EOS 50D camera, 50mm lens (for hands), 85mm (for models), specular light (from front or side), foam-core fan.
Find more about Eydis Einarsdóttir on her website:

© 2018 The Jewelry Loupe. All rights reserved.
This page contains affiliate links.