Last week, some of my favorite jewelry photographers shared their tips for how to shoot jewelry. Now let’s look at one of the trickier aspects: photographing gemstones.
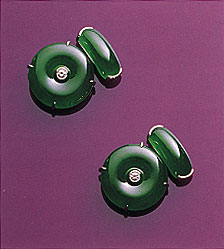
Different gem cuts require different lighting. Too much white light causes glare on polished flat surfaces, so diffused light works best with faceted stones. The most common mistake people make lighting faceted stones is lighting them from behind, says Tino Hammid, a Los Angeles-based jewelry photographer who has been producing jade images (like these) for Christie’s Hong Kong jewelry sales for about 25 years.

Cabochons, on the other hand, need “a more specular light that gets down into the depths of the stone,” says jewelry photographer John Parrish. “In that case, you’re showing not so much the shape as color and clarity.”
For jadeite, Tino Hammid uses a large, rectangular diffuser, carefully placed.
Take care to hide things behind the stone, so you don’t see the background through it. A common snafu with cabochons: reflecting yourself, or your equipment, in the surface.
Unless you angle it strategically, a square light, for example, will create a square reflection.
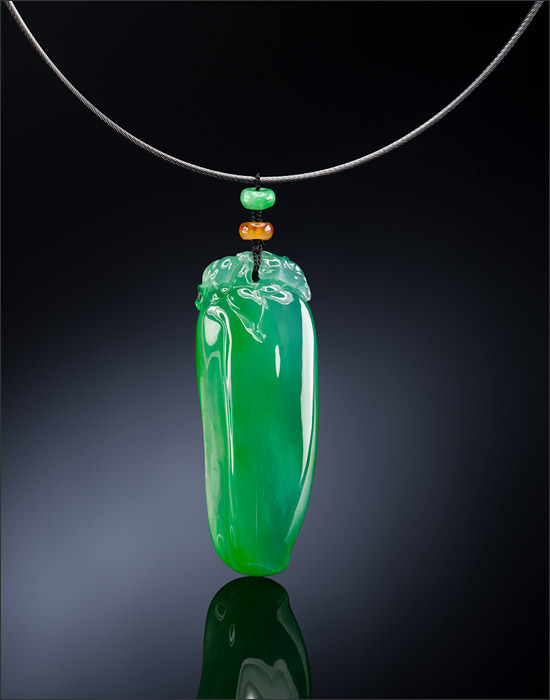 Jade pendant photographed by Eydis Einarsdottir of Studio 80s in Vancouver
Eydis Einarsdottir shot this jade pendant as a commercial image. “The client wanted to make sure the jadeite was glowing and that it was very translucent,” Eydis says. “To get that type of light into the rock, I used a round, circular light on high power to light it up and create a nice reflection.”
When choosing a background, decide first if it’s more important to create a dramatic photograph or to accurately depict the gemstones or jewelry.
“If the primary requirement is accuracy, you should probably stick with a neutral color, something that doesn’t influence the stone too much,” Parrish advises. “But if you can get the stone up off the background, or figure a way to light the jewelry where the background doesn’t really influence the stone, you may want to go with a contrasting color or something more dramatic.”

Opals require a technique that actually limits the focal range, or depth of field. The secret to maximizing opal’s pools of color, according to Hammid, is to open the aperture to let in more light.
But, of course, it’s never that simple. Opals vary dramatically – that’s why we love them! – and often require different lighting. Hammid recalls shooting a suite of faceted fire opals once, where one had a colorless body but lots of play-of-color (fire) while the others had a range of orange but no fire. The play-of-color opal needed direct light while the rest required diffused light. So he shot the suite twice and combined the images in Photoshop (more on that trick in a future post).
Emeralds are notoriously difficult to capture on film; they come out looking like tourmaline. That’s because the chromium in emeralds responds to the chromium or emulsion in the film. Similarly, tanzanite ends up with a reddish cast, resembling amethyst.
Shooting digitally has solved most of that problem because images are captured digitally in the red/blue/green (RGB) spectrum instead of the cyan/magenta/yellow (CMY) spectrum of film. “We all remember troubles getting a realistic green with emerald,” Hammid says. “But green captures very well in RGB and jade tends to be very close to the green channel, so you can make a nice, bright jade green by shooting it digitally.”

Focus is the primary weakness of most amateur gem and jewelry photography, says Tinnee Lee of Lee-Carraher Photography. “People need to know the maximum focal length of their lens. Pictures end up out of focus because they’ve gotten closer than the limit of the lens. They need to know where things go out of focus. If it’s too close, they need to use a different camera or a zoom mechanism.”
Mastering digital imaging and computer technology is becoming increasingly important, but anyone who makes a living shooting gems or jewelry will tell you it’s worthless without a good initial image. Tweaking in Photoshop will only get you so far.

“The computer is just a tool, like a different lens or whatever else you use to create the image,” says Parrish. “But you still have to be able to light it and know what you’re looking at in order to get the color to come out of the stone or to light the metal so that it looks like metal.
“That’s the exciting part of photographing gemstones and jewelry, when you get it to come alive in front of you,” he says. “It’s easy to take a photograph but when you can take a medium that’s two-dimensional and get a third dimension to show up—that’s when you’ve been successful. All of us who photograph this stuff for a living, we all have a passion for it. We’re all trying to take it beyond just a gemstone or a piece of jewelry and show the art of the people who made it.”
Tino Hammid’s equipment
Mamiya M645-AFD III medium format camera (on Adorama)
Mamiya Leaf Aptus-II 33MP digital back (on Adorama)